Grip Fighting Basics for BJJ
Master essential BJJ grip fighting: where to grip, how to break and keep grips, grip-strength drills, and position-specific tips for controlling matches.
Written by BJJ Academy Finder Editorial Team
Grip Fighting Basics for BJJ
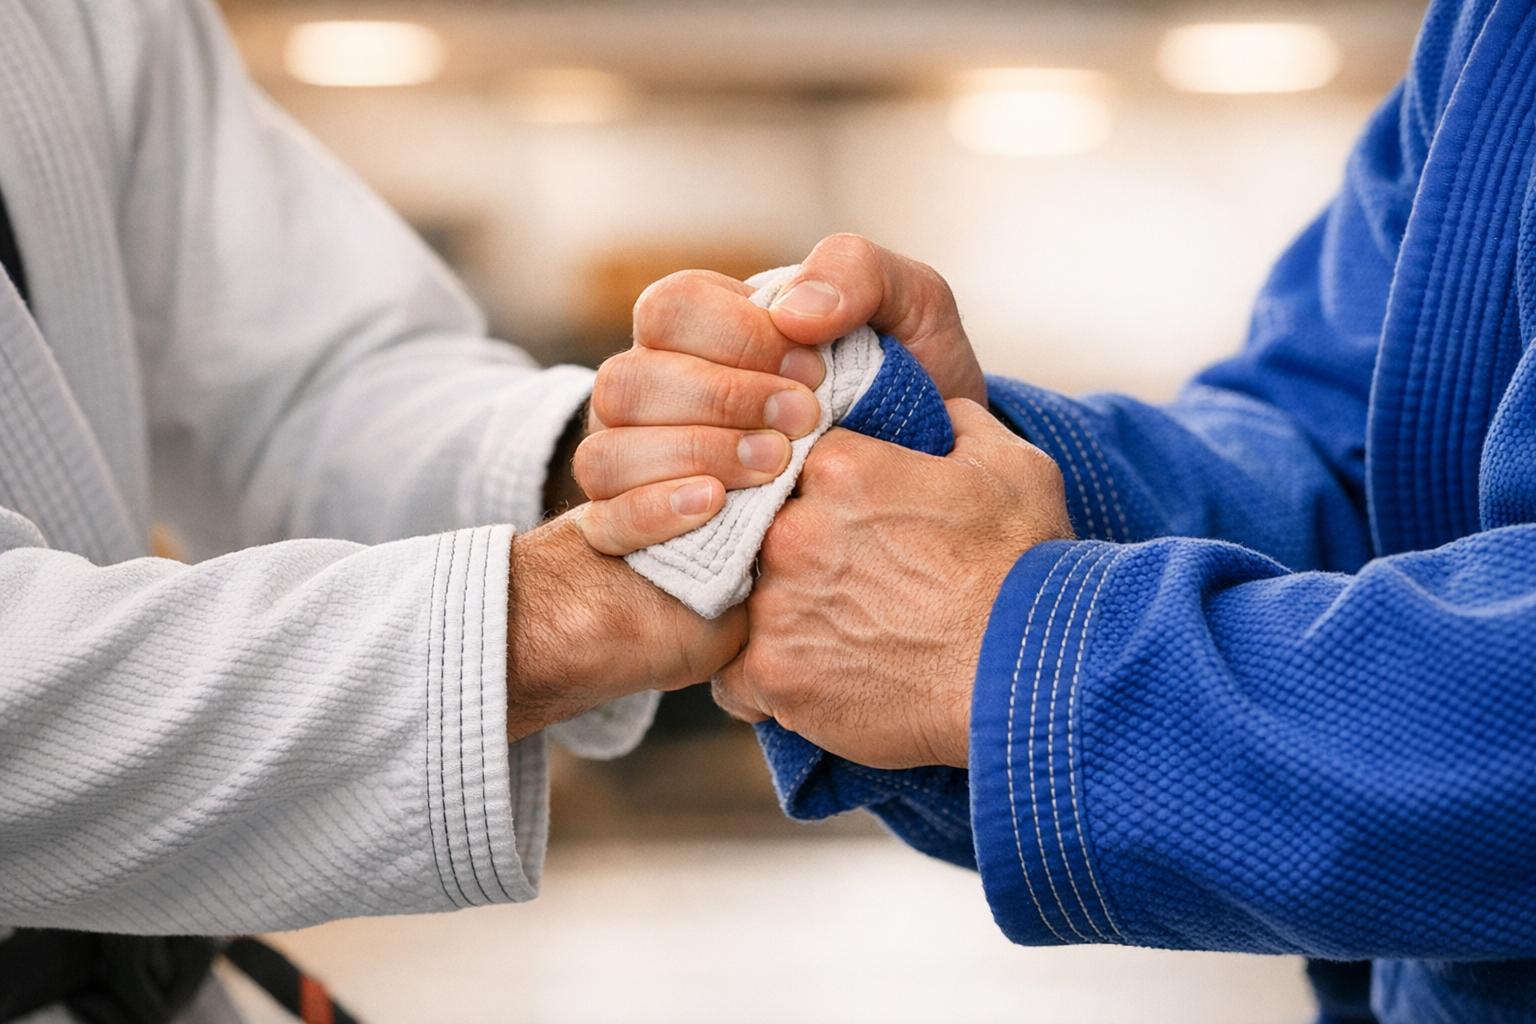
Grip fighting is the starting point of every BJJ match. It’s about controlling your opponent's movements by securing and breaking grips on their gi. Mastering this skill can help you dictate the pace, maintain control, and set up attacks effectively.
Here’s why it matters:
- Grips dictate control: Strong grips help you dominate takedowns, guard passes, and submissions.
- Energy efficiency: Proper grip techniques prevent early fatigue and improve endurance.
- Positioning advantage: The right grip can disrupt your opponent’s strategy and give you leverage.
Key takeaways:
- Start with basic grips like collar-and-sleeve or cross-sleeve for control.
- Use the two-on-one principle to break grips effectively.
- Practice grip-specific drills and build strength with exercises like dead hangs and farmer’s carries.
- Avoid over-gripping to conserve energy during matches.
Whether you’re a beginner or advanced practitioner, focusing on grip fighting can elevate your BJJ game. If you're looking for a place to train, you can find a BJJ gym nearby to start practicing these techniques. Let’s dive into the details.
Core Concepts and Positioning for Gripping
Where to Grip in Gi BJJ
The gi provides multiple gripping options that help control your opponent and set up attacks. Collar and lapel grips are essential for managing posture and applying chokes effectively.
Sleeve grips are key for breaking your opponent’s structure and stopping them from using their arms for balance. A common technique is the Pistol Grip, where you bunch the fabric into a firm hold, allowing for dynamic movements. An even stronger option is the Pocket Grip: slide four fingers inside the sleeve cuff, pinch the fabric, and fold it over with your thumb on the outside. This grip offers unparalleled control over your opponent’s limb.
Pant grips are valuable for controlling the knees and hips, making them indispensable during guard passes like the Toreando or X-pass. They also prevent your opponent from recovering their guard. Belt and hip grips focus on the opponent’s center of gravity, particularly useful for stacking or maintaining dominant top positions. Another effective strategy is the two-on-one principle, which involves using both hands to control a single limb or break a grip, giving you a significant leverage advantage.
Now, let’s dive into how grip choices vary based on position.
Best Grips by Position
The best grip depends on where you are in the fight. When standing, collar-and-sleeve or same-side lapel grips are excellent for controlling distance and setting up takedowns. In open guard, combinations like collar-and-sleeve or double-sleeve grips help maintain guard and create opportunities for sweeps.
From side control, a Gable Grip (palm-to-palm connection) keeps pressure on your opponent and prevents escapes. Underhooks are also critical, as they anchor your opponent during transitions. In mount or back control, the seatbelt grip - where one arm goes over the shoulder and the other under the armpit, with hands clasped over the chest - is crucial for maintaining control and setting up chokes. Another versatile grip is the figure-four (Kimura) grip, where you grab your opponent’s wrist and use your other hand to hold your own wrist. This grip creates a powerful lock for submissions from various positions.
While grips are vital, they work best when paired with proper body positioning.
Body Positioning for Better Grip Control
Your body position can make or break the effectiveness of your grips. Keeping your elbows low tightens your hold and limits your opponent’s ability to escape. For example, when using a cross-collar grip, keep your elbow low and position your forearm across their chest to block their attempts to circle behind you.
Angles and alignment are equally important. With a neutral double lapel grip, stepping off-line and pressing your forehead into your opponent’s temple can disrupt their alignment and create openings. To break an opponent’s grip, move your body in the opposite direction of your hands while maintaining an upright posture for maximum leverage.
"Understanding the where, when, why and how to grip can provide you with the ability to grip smart and use less energy." - Travis Stevens, Olympic Silver Medalist
Proper distance management is another crucial aspect. For example, a stiff arm combined with a collar grip keeps your opponent’s head away from your legs, neutralizing their takedown attempts. Controlling their head and shifting it out of alignment with their spine weakens their posture, making it easier to manipulate their movements. Efficient body alignment minimizes wasted energy, which is essential for grip fighting in BJJ.
sbb-itb-d583f1e
Grip Fighting Overview: The Key to Controlling Offense
Basic Grip Fighting Skills for Beginners
Essential BJJ Grips Guide: Types, Positions, and Applications
Key Principles of Grip Fighting
Grip fighting is all about using efficient grip placement and combining it with full-body movement. When breaking an opponent’s grip, don’t just rely on your arms - move your entire body in the opposite direction of their hand to create maximum leverage.
A useful strategy is the two-on-one principle: using two hands to overpower one. As Evolve MMA explains, "Your two hands are almost always going to be stronger than your opponent's one hand". It’s also smarter to stop your opponent from establishing their preferred grip in the first place rather than trying to break it later. Jimmy Pedro, a World Judo Champion, sums it up well: "If they don't get the grips they want, their game never gets going".
Focus on controlling key areas like the lapel, elbows, sleeves, and wrists. These points provide leverage and control. Additionally, controlling the head can influence your opponent’s spine and posture. It’s also important to differentiate between guiding grips, such as the C-grip used during scrambles to provoke reactions, and control grips, like the cross-collar grip, which anchors your opponent for more deliberate attacks. Mastering these concepts is the foundation for effective grip fighting.
First Grips to Master
Once you understand the basic principles, it’s time to practice specific grips. A great starting point is the collar-and-sleeve grip. Place one hand on your opponent’s cross-collar and the other on their same-side sleeve. This grip helps control their posture and prevents them from using their hands to post during sweeps. It’s especially effective in closed guard setups, like preparing for a scissor sweep.
Another essential grip is the cross-sleeve grip, where you grab your opponent’s sleeve with the opposite hand (e.g., your right hand grabbing their right sleeve). This grip can rotate their body and expose their back, making it ideal for back takes or pendulum sweeps. When standing, the standard collar grip is a must-have. Grab the back of their neck, where a shirt tag would sit, to stiff-arm your opponent. This grip is energy-efficient and can neutralize single-leg or double-leg takedown attempts.
The four-finger grip is another powerful tool. Insert four fingers into the collar (thumb out) or grip the outside of the sleeve or pants to create a "pocket" for control. However, always remember: inserting fingers inside the sleeve or pant cuffs is against IBJJF rules and can lead to injuries.
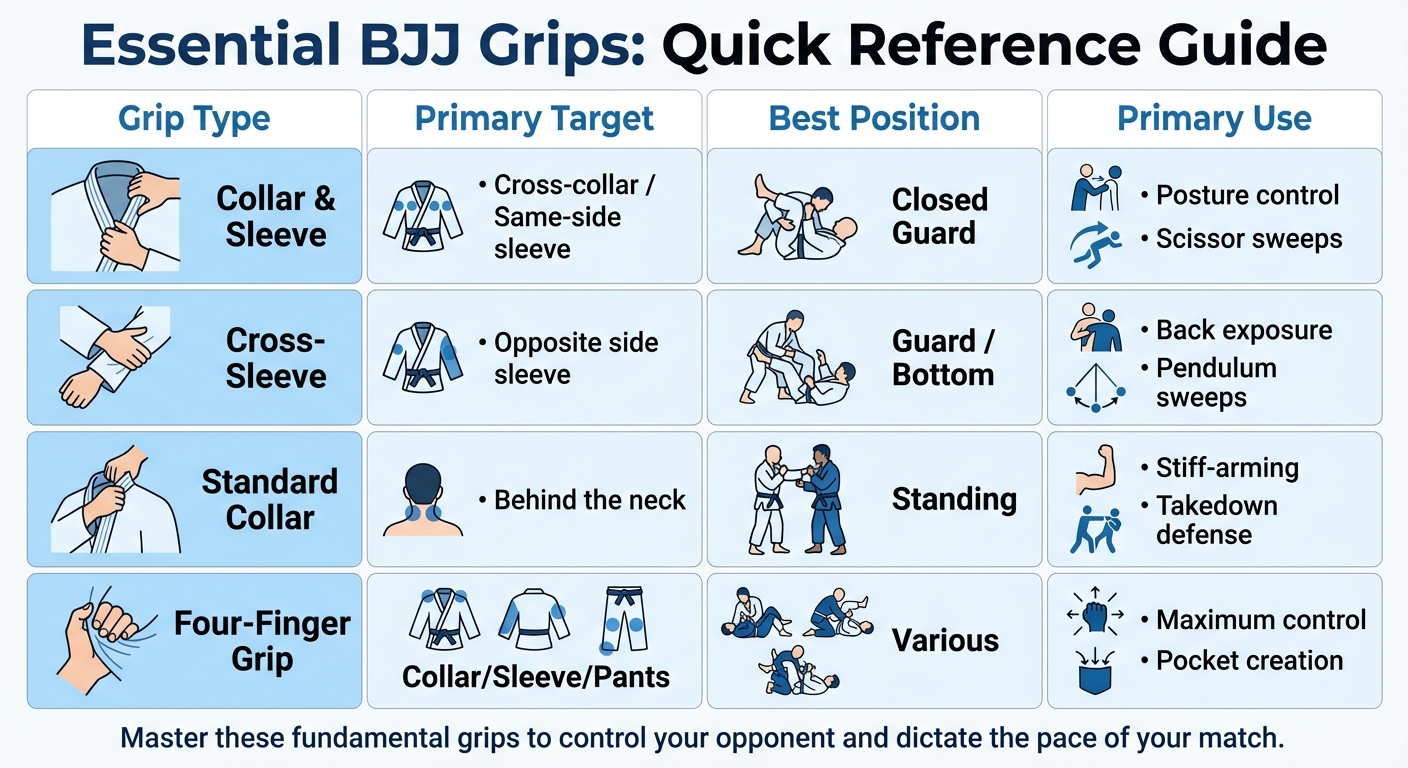
| Grip Type | Primary Target | Best Position | Primary Use |
|---|---|---|---|
| Collar & Sleeve | Cross-collar / Same-side sleeve | Closed Guard | Posture control & Scissor sweeps |
| Cross-Sleeve | Opposite side sleeve | Guard / Bottom | Back exposure & Pendulum sweeps |
| Standard Collar | Behind the neck | Standing | Stiff-arming & Takedown defense |
| Four-Finger Grip | Collar/Sleeve/Pants | Various | Maximum control & Pocket creation |
Step-by-Step Grip Techniques
To dominate grip exchanges, focus on securing the first grip. Being proactive often determines the flow of the match. When going for a collar grip, try the "pass-off" technique: if your opponent blocks your lead hand, use your rear hand to grab the lapel lower down near their belt - an area harder to defend. Then, pull it open and transfer the grip to your lead hand higher up near their chest.
Once you’ve established a collar grip, follow the inside control principle. Keeping your hands inside your opponent’s arms gives you leverage and restricts their movements. Add a sleeve grip on the same side to complete the collar-and-sleeve combination. Tighten your grip by bending your elbow or pulling your thumb toward your shoulder. This removes slack and strengthens your hold before attempting grip breaks.
Transitioning from defense to offense often involves baiting and precise timing. For example, let your opponent grab your wrist intentionally. This "bait" lets you predict their next move and set up a grip-breaking sequence or counter-attack. Grappling coach Taylor Davis highlights the importance of body mechanics in grip fighting: "Grip strength is augmented by proper body positioning, hip engagement, and weight distribution, making holds more durable and effective". To make your grips even harder to escape, drop your elbows to your ribs - this is particularly effective in no-gi scenarios, where surfaces can be slippery.
Breaking and Keeping Grips: Common Mistakes to Avoid
How to Break Common Grips
When it comes to breaking grips, the two-on-one principle is your best friend - use both hands to overpower a single grip.
For sleeve grips, try the 45-degree push: grab your opponent's sleeve with both hands, push their hand away at a 45-degree angle, and move your body in the opposite direction. Another effective method is the thumb circle - rotate your thumb outward, lift it, and pull away to break their hold.
The knee strip is another solid option against sleeve grips. Place your knee gently on their wrist (no aggressive force), extend your leg, and simultaneously pull your arm back. This uses your leg's strength to break their grip.
For collar grips, rely on full-body movement. In no-gi scenarios, break C-grips by circling your limb toward the gap between their thumb and fingers - the weakest part of their hold.
| Grip Type | Purpose | Break Technique |
|---|---|---|
| Sleeve Grip | Controls distance, prevents posts | Two-on-one push, Thumb circle, Knee strip |
| Collar Grip | Breaks posture, sets up chokes | Two-on-one strip, Forearm framing |
| Pant Grip | Controls legs, aids in guard passing | Kick the leg out, Push the wrist down |
| C-Grip (No-Gi) | Controls wrist/ankle | Circle toward the thumb opening |
How to Keep Your Grips
Breaking your opponent’s grip is only half the battle - keeping control is just as crucial. The key? Don’t overuse your strength. Gripping too tightly can burn out your forearms in minutes. Instead, vary your grip pressure: relax when secure and tighten only when necessary. For example, to protect your sleeve grip, bend your elbow and bring your thumb toward your shoulder to remove slack.
When holding a cross-collar grip, position your wrist against their shoulder and your forearm across their chest. This creates a sturdy frame that keeps them from circling behind or closing the gap. Keeping your elbow high also blocks their vision and makes it harder for them to establish a two-on-one grip on your arm.
Common Mistakes and How to Fix Them
Understanding common grip mistakes can help refine your technique. One major error is relying on just one hand to break grips - it’s often ineffective and wastes energy. Instead, use both hands or your entire body to maximize efficiency.
Another frequent misstep is ignoring the grip fight altogether. Letting your opponent establish their grips first immediately puts you at a disadvantage. Be proactive - fight to secure the first grip. Beginners often rely too much on strength, which leads to quick fatigue. Instead, focus on technique and leverage.
"The single best thing you can do to stop your opponent from dominating you in grappling is to get rid of his grips on you." – Stephan Kesting
Avoid settling for 50/50 grip scenarios, where both competitors have identical grips. This forces you to rely on speed or strength rather than technique. Lastly, mix up your grip-breaking methods to keep your opponent guessing and prevent them from predicting your next move.
Drills and Training Tips for Grip Development
Partner Drills for Grip Fighting
Grip fighting rounds are a great way to build both endurance and technique. Set a timer for 2–3 minutes and complete 3–5 rounds where your main focus is establishing dominant grips, like collar-and-sleeve or double-wrist control, while actively preventing your partner from doing the same. This drill mirrors real match scenarios, teaching you when to tighten your grip and when to ease off.
Another effective drill involves breaking and re-establishing grips. Here, your partner holds a firm grip on your sleeve, collar, or pant leg, and your job is to break that grip using techniques you've practiced. Once you’ve broken their grip, they immediately try to regain control, creating a fast-paced exchange that sharpens your ability to maintain pressure under resistance. To take it further, spend 10–15 minutes practicing spider guard retention drills under resistance. This helps develop the endurance required for strong sleeve grips and proper foot positioning. Afterward, integrate solo exercises to reinforce these skills.
Solo Grip Training Exercises
When you're training solo, a gi jacket or thick towel can substitute for an opponent's grip. Hang the gi or towel over a pull-up bar and perform 3–4 sets of hangs, holding for 30–60 seconds each time. Another excellent exercise is farmer's carries with heavy dumbbells or kettlebells. Walk 50–100 feet for 3–4 sets, focusing on maintaining a strong grip throughout. Dead hangs from a pull-up bar are another option to build isometric strength - hold for 30–90 seconds across 3–4 sets, ensuring you engage your back muscles and keep your shoulders retracted to protect your joints.
It's also important to train your finger extensors, the muscles responsible for opening your hand. Using rubber bands or finger extenders can counteract the constant gripping motion in BJJ, helping prevent the "claw hand" effect that many grapplers experience [18,20]. Additionally, plate pinches - holding weight plates by their edges for 20–60 seconds - are great for strengthening your thumb and fingertips, which are key to overall grip power.
Safety and Progression Tips
To get the most out of grip training without risking injury, prioritize safety and recovery.
"The gym is meant to supplement your training on the mats, not mimic it exactly. It's meant to fill the gaps left by only training for one sport." – Selena Pistoresi, Victory Submission Strength
Always warm up thoroughly before grip-intensive exercises to protect your tendons. It’s also wise to schedule grip-specific work toward the end of your training session [1,18]. If your grips feel unusually weak or overworked, cut back on volume or take an extra rest day.
For recovery, use a lacrosse ball or massage gun on your forearms 2–3 times per week. Contrast baths - alternating between warm and cold water for one minute each across 3–5 cycles - can help reduce inflammation. Studies from BJJ tournaments reveal a drop in grip strength of 11% to 16% from one match to the next, making it essential to manage fatigue for consistent progress.
Conclusion
Grip fighting forms the backbone of Brazilian Jiu-Jitsu. The competitor who secures dominant grips first gains control over the match, setting the pace and forcing their opponent into a defensive position.
"If your grips suck, you suck at jiu jitsu... sorry, but it's true." – Jimmy Pedro, World Judo Champion and Coach
This guide highlights that true mastery comes from focused practice and attention to detail. From understanding the difference between guiding and control grips to applying the two-on-one breaking principle, and even building strength through targeted drills, these techniques form a comprehensive grip fighting system. Experts showcase exceptional grip strength not because of innate ability, but through consistent, deliberate training. Repetition turns these techniques into second nature.
Developing effective grips requires dedication and consistent effort. Solo exercises like farmer's walks and dead hangs can build raw grip strength, but the most practical way to enhance grip resilience is by rolling with training partners over time. A strong technical foundation is best nurtured in a setting where experienced instructors can fine-tune your technique, correct bad habits, and guide your progress. Finding the right academy is crucial for long-term growth.
For those in search of a quality training environment, the Brazilian Jiu-Jitsu Gyms Directory at https://bjjacademyfinder.com is a valuable resource. It provides detailed information about academies across the United States, including program offerings, instructor qualifications, and user reviews, helping you connect with the ideal place to train.
"Understanding the where, when, why, and how to grip can provide you with the ability to grip smart and use less energy." – Travis Stevens, Olympic Silver Medalist
Start practicing these grip fundamentals today, and you’ll see noticeable improvements in controlling positions, executing sweeps, and setting up submissions. Master your grips, and you’ll master the match.
FAQs
What are the best grips to use in different BJJ positions?
Grips in Brazilian Jiu-Jitsu (BJJ) play a crucial role in controlling your opponent, setting up sweeps or submissions, and defending against attacks. The effectiveness of your grips depends largely on your position and whether you're training with a gi or no-gi.
In standing positions, grips like the collar-and-sleeve or cross-collar offer excellent control for executing takedowns and throws. Moving to the closed guard, a collar-and-sleeve grip not only helps manage your opponent's posture but also creates openings for sweeps or submissions. For those working from open guard, combining grips like the lapel and pant can give you solid balance control, making it easier to set up sweeps.
When it comes to side control and mount, grips such as cross-collar or lapel-to-wrist are key. They help maintain pressure on your opponent and open the door to submissions like arm-bars or chokes. From back control, the seatbelt grip - where one arm goes over the shoulder and the other under the armpit - provides unmatched control and is perfect for setting up a rear-naked choke.
In no-gi training, grips shift to techniques like wrist control, over-hooks, under-hooks, and palm-to-palm holds. Adapting your grip to the specific position ensures better control, conserves energy, and improves your chances of successfully transitioning or attacking.
What are the best ways to improve grip strength for Brazilian Jiu-Jitsu?
Improving your grip strength for Brazilian Jiu-Jitsu means working on the muscles in your hands and forearms to boost both power and endurance. To get started, try exercises like towel or gi pull-ups, farmer’s carries with heavy weights, and thick-bar holds. These target your grip directly. You can also keep it simple with tools like a bucket of rice or a sandbag for hand-digging exercises, which help build crushing and pinching strength.
On the mats, focus on gripping and breaking grips during your rolling sessions. Repeatedly grabbing the gi lapel, sleeve, or collar during practice naturally strengthens your grip over time. The key is consistency - dedicated grip training paired with regular practice will make a noticeable difference. If you’re looking for more structured guidance, check out local academies in the Brazilian Jiu-Jitsu Gyms Directory, where many schools include grip-focused conditioning in their classes.
What are the most common mistakes beginners make in grip fighting?
Beginners in Brazilian Jiu-Jitsu often stumble when it comes to grip fighting, a crucial aspect that can make or break their game. Here are some common mistakes that can slow progress and give opponents an edge:
- Overlooking the grip battle. Many newcomers underestimate how critical grip control is, letting their opponents establish dominant grips right from the start.
- Relying on strength instead of technique. Grip fighting isn’t about muscling through - it’s about smart hand placement, timing, and conserving energy.
- Sticking to one grip for every scenario. Using the same grip across different positions limits your offensive options and leaves you open to counters.
- Failing to break grips effectively. Allowing an opponent to maintain their grip for too long gives them control and wastes precious time.
- Choosing unsuitable grips. Picking the wrong grip for a specific position weakens your control and can leave you vulnerable.
By sharpening your technique, adapting grips to fit each situation, and staying active in grip exchanges, beginners can set a solid groundwork for success in both gi and no-gi Brazilian Jiu-Jitsu.
Related articles
Share this article